I've watched Nigella's episode four times, noting down the recipe very carefully. I'm approaching this one with a bit of confidence, as essentially Nigella's pasta dish looks like a fairly traditional rustic Italian pasta dressed up with a bit of salami. That's really the only ingredient I have to change to make vegan. Not too hard at all!
After watching Nigella carefully I went and did a bit of research. What is salami? Well, it's generally a big Italian sausage, most commonly made from pork meat. (that's from pigs... like the one in Babe, or Charlotte's web.) They kill the pig, skin it, remove the muscle and fat, (the meat) and then use the very fatty portion of the meat to make the salami. The meat is mashed up with salt and spices, shaped into a sausage, and left to ferment. A mould forms on the outside of the salami protecting the inside from oxygen breathing bacteria species that can be dangerous for people to consume.
Okay, so Salami is spicy-fatty-fermented-mould covered pig. I can find something vegan that could replicate the experience surely!
To the kitchen.
Almost everything else in Nigella's recipe is vegan. To make my version you'll need the following ingredients.
Pasta- any 100% durum wheat pasta in small shapes. I used a 500 gram box.
Tomatoes- 1 tin, diced tomatoes.
Mixed herbs- you can use a bouquet garni, or mixed italian herbs, or any combination of things like basil, oregano, parsley and/or bay-leaves.
Paprika
salt & pepper.
Canellini beans (white beans) 1 can.
Nuttelex (optional really you could get away without it)
vegetable oil suitable for frying something.
"not bacon" or "facon" or "bacon style rashers" about 4 of them.
This looks like an impressive list, but most of it is the kind of thing you could quite feasibly have hanging around in your pantry or fridge right now. I didn't even need to go to the supermarket for this one.
Also I did this on my lunch break while working from home, so this is a nice and quick one, 20 minutes go to wo, and that included getting the dishes done.
Today I'm joined by my girl-cat, here she is.
 |
| Nawwwwwww |
The very first thing you'll do though, is pretty boring. Put the water on to cook your pasta. Use a big pot with a generous amount of water. In order to save a bit of electricity and get it heating more quickly use a pot with a well-fitting lid. Crank the stove up to high to get it going.
While the water is heating, roughly chop your rashers of not-bacon into bite-size and interesting shapes. I then put a large wok on (lacking a suitably sized big fry-pan) if you have a big and deep-ish frying pan that would work great as well.
I used (very roughly) two tablespoons of vegetable oil in the pan, this is to stop the not-bacon sticking to the pan, and to replace some of the fat in the dish that would be imparted from having high fat meat there. There is a health benefit here, as the fat is being replaced with more heart-friendly unsaturated fats.
While the oil is heating (on a medium heat) generously rub the not-bacon all over with some paprika. This will give it a good measure of spicy-ness. By the time you've gotten this done, the oil should be heated enough. You can test this by gently tipping the pan a little side-to-side, once it's heated the oil will be less viscous and will slide around the pan much more easily than when its cool. If you want to, take the time to experiment this, observe the oil cool, then heat it and observe its behaviour once warmer. Congratulations, if you completed this experiment you did a small study in Rheology, an exciting and interesting field of science/engineering.
Once I got my not-bacon and paprika in the pan it looked like this.
 |
| Looks Kinda.... meaty. |
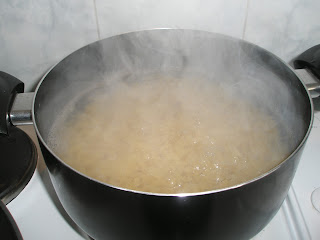
Also, my water had just started boiling, probably because I was busy tooling around with my camera and my cat rather than working on my cooking.
Check the packet directions for your pasta. Mine only wanted 7 minutes to cook. Smaller shapes will cook faster because there is a greater surface area to volume ratio than in bigger pasta.
Here's an action shot of my pasta.
 | |||||||
| Also an exciting way of disproving the "watched pot" theorem |
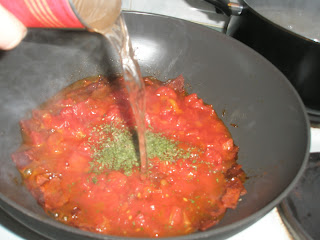
Once the tomatoes are in, Nigella then asks me to put some herbs in. I used 1 teaspoon each of dried basil, dried parsley and dried oregano. If you use a bouquet garni or bay-leaves remember to fish them out once you've finished cooking. Otherwise, put herbs in to your taste. You can start with the herbs I used, taste test as you are cooking, and adjust to your personal taste preference. You can at this stage add a little salt and pepper if that's what you like.
Mine looked like this.
 | |||
| Another Action shot! Look at me pour water like a boss. |
 |
| Roughly 1 nob? |
You've now got a can of canellini beans to tackle.
The Canellini bean is a medium sized white bean, commonly used in rustic Italian cooking. Particularly in dishes from the Tuscany region. It's a lovely bean, mild in flavour, smooth in texture, and fairly soft out of the can. The canellini beans won't need much cooking at all.
You need to open the can of beans, and empty them into a colander that's placed in your sink. (I really hope you read the whole sentence before doing that... and are not now standing in your kitchen with bean-juice on your feet and a colander in your hand)
You need to give the beans a good rinse, but treat them gently as they can break up quite easily. Use the cold water tap, and a fairly gentle stream to rinse them off. Use your fingers to encourage the water all through the beans and rinse until the water runs completely clear.
Give the colander a quick shake to get rid of the excess water, then tip the canellini beans into your pasta sauce.
At this stage my pasta was cooked. I test it by fishing a piece of the pasta out with a spoon and tasting it. If it tastes and feels good to your teeth (not too soft, not too chewy and certainly not crunchy), then it's done. I find this is a bit tidier than flinging strands of spaghetti at my splash-back and waiting for them to stick, or fall to my bench and make even more mess.
Now you need to add the pasta to the big pot with the sauce and give it all a final stir around. Here's now mine looked.
 |
| Hmmmmm |
 | |
| Let's be honest, this looks pretty boring. |
Phew, now that my food is off camera I can zing it up with a splodge of sweet chilli sauce before I eat it.
The verdict. My version was probably similar in cost to Nigella's. Overall this dish was very cheap per serving. I've got containers and containers of this pasta in my fridge and freezer now. Taste... well I'll be honest, I wasn't excited by it, frankly this pasta was fairly boring. I don't think that my vegan modification made it dull, I think that the pasta-sauce ratio was a bit keen, and that a more gutsy tomato base to the sauce and maybe some more vegetables would have made this much better.
Nutrition... my vegan version is probably slightly healthier, because I've replaced saturated fats in the meat and butter with mono and poly unsaturated vegetable fats.
The recommendation: If you're going to make a vegan pasta, don't make this one. I wouldn't serve this at a dinner party. If you're looking for a quick cheap feed, and are not too jazzed about how exciting the meal is, then this recipe is a go-er. Makes great student food, quick, cheap, nourishing.
Here's a link to a vegan pasta that I've made before and really love... if you want a vegan pasta to really savour, then I personally think you're better off with this recipe.
http://www.bestrecipes.com.au/recipe/Classic-Napoletana-Pasta-Sauce-L3081.html
The only substitution needed to make it vegan (the recipe is vegetarian but not vegan as-is) is to swap the butter in the recipe for some nuttelex. It's a delicious rich, fresh lovely pasta sauce. If you happen to have a veggie garden with fresh home-grown tomatoes, even better.
Thanks for reading, I hope you enjoyed this blog entry. Next entry I will be taking on a rich and indulgent dessert. I hope your sweet-tooth is ready for some action.

No comments:
Post a Comment